Groups are used to organize characters into groupings like faction or position.
Table of Contents
To edit group settings:
demographics.yml.The default demographics are set up for a Battlestar game just so you have an example to follow. There are four groups, but we’re only going to look at one here for an example:
    Faction:
      desc: Military faction.
      wiki: ''
      values:
        Navy: Join the fleet, see the worlds.
        Marines: Semper fi.
This is a YAML Hash, with key:value pairs.
The outer hash is just: Faction:FactionData.
FactionData is itself a hash, with key:value pairs of description, wiki page link (optional), and values.
Values is also a hash, with key:value pairs of the faction names and descriptions.
You have to define at least one group for your game, but don’t despair. Most games will have some type of character groupings if you look hard enough. Here are some ideas:
If all else fails, you can always just make a bogus group with a single available value, like “Faction” / “Everyone”.
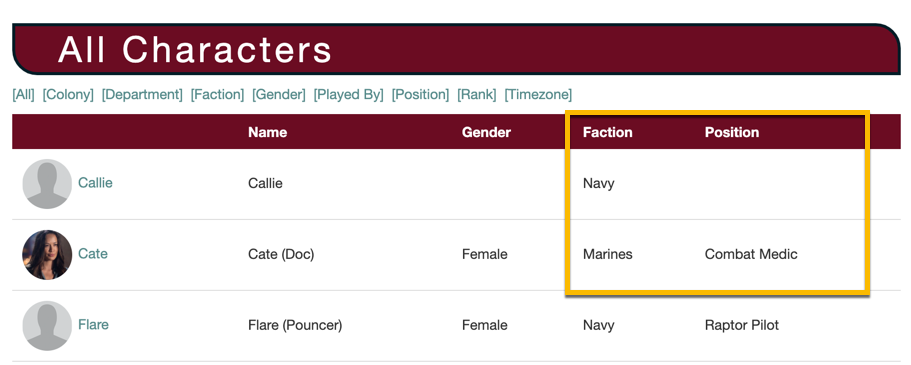
The web portal character gallery uses groups to organize characters. By default, it organizes them into tabs by Faction, and then into sub-groups by Position. If you’re using custom groups, you’ll want to change this.
website.yml.character_gallery_group to the group (e.g. Faction, Nationality) you want for your primary tabs on the character gallery.character_gallery_subgroup to a different group if you want the characters sub-sorted within the tabs. You can set it to an empty string ("") if you don’t want to sub-sort.The chargen and roster welcome messages uses group to give an overview of the character. If you’re using custom groups, you’ll need to change this or you’ll get an error.
chargen.yml.welcome_message to ensure it doesn’t reference groups that don’t exist.roster_arrival_message in idle.yml.For example, the default is: Please welcome %{name}, our latest %{position} to be approved!
If you don’t have positions and want to highlight faction instead, you might want to say: Please welcome %{name} to the %{faction} faction!
You can use any of your groups in the welcome message using %{groupname}.
Ranks are based on faction by default–meaning that each faction gets its own rank chart. If you don’t have factions but still want to use ranks, you’ll need to update your ranks config. See Configuring the Ranks System for details.
If you aren’t using ranks, you can turn them off completely in the Optional Plugins List.
The who list, roster, and census all reference groups in their column fields.
These are edited, respectively, in:
| List | Config File | Setting |
|---|---|---|
| Who List | who.yml | who_fields |
| Census | demographics.yml | census_fields |
| Roster | idle.yml | roster_fields |
In all cases, you can change which groups are used simply by adding/editing/removing the group-related fields. For example, this field shows the character’s Faction with a title of “Faction”, and it will be 20 characters wide in a MU client.
  - field: group
    width: 20
    title: Faction
    value: Faction