There are a variety of things you can configure about the Web Portal.
Table of Contents
You can configure the welcome text on the Web Portal’s home page.
The home page text can contain Markdown formatting and ansi formatting codes.
Ares comes with a default theme. There are others available as AresCentral Theme Directory, including a dark one. You can install one of the other themes simply by using the in-game command theme/install <github url>. For example: theme/install https://github.com/AresMUSH/ares-dark-theme
To restore the default theme, use theme/install default.
Once you’ve selected a theme (or if you keep the default one) you can customize it a great deal using the settings described below.
To change the colors on the web portal:
You can alternately edit the colors.scss config file (via Admin -> Setup -> Text Files) and enter colors manually using HTML color codes.
These colors control various standard AresMUSH controls, and you can also use them in your own custom styles:
.my-widget {
  color: $primary-color;
}
Custom styles can also utilize the standard rainbow colors, such as $lightest-gray and $muted-blue. View rainbow.scss (also accessible via Admin -> Setup -> Text Files) to see a complete list.
There are three main images used by the website.
You can upload new versions on the website.
theme_images directory.You can use Custom CSS, explained below, to change which images are used in each section. For example, if you want to use different backgrounds for the profile and log pages, or a JPG instead of a PNG for the title background.
The default style positions the header background in a 200 pixel high area using background-size: cover and background-position: center.
Take the BSGU background image, for example. Here is the original image. Notice that the center of the image is near the Cylon’s shoulder.
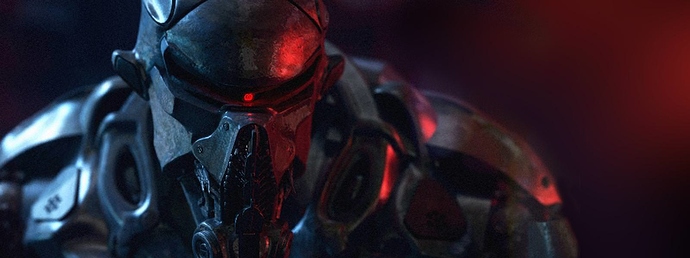
In wide browsers, you’ll get a 200 pixel wide swath across the center of the image. Notice that the Cylon’s shoulder is still in the center of the header.


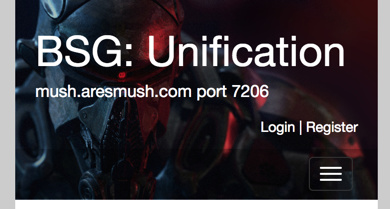
And in narrow browsers, including mobile, the height will be scaled down to be 200 pixels high, and the width will be cropped to fit. Notice again that the Cylon’s shoulder is still in the center of the header.
You can pick a different focal point (other than center) and scale the image in different ways, as explained in the W3Schools tutorial on background positioning. This can be done using Custom CSS, explained below.
The top_navbar setting lets you customize your web portal’s navigation bar. Note that the “Account” items (notifications, mail, etc.) will automatically move to the front of the navbar on small browsers.
Here’s an example of the navbar config:
- title: Home
  route: home
- title: First Dropdown Menu Title
  menu:
     - route: some-ember-route
       title: First Page Title
     - route: another-ember-route
       title: "<i class='fas fa-info-circle" /> Second Page Title"
- title: Second Dropdown Menu Title
  menu:
     - route: random-ember-route
       title: Third Page Title
     - divider: true
     - url: http://somewhere.com
       title: Some Outside Page Title
Some things to note:
menu option to list the menu’s pages) or a single page link (omit the menu option)You can use the roles option to restrict a top nav menu to certain roles. Specify a list of role names. Even if there’s only a single role, still specify it like a list. For example:
- title: Admin
  roles:
  - admin
  - coder
  menu:
  - title: Jobs
    route: jobs
For an internal page, list the page route and display title. For example:
- title: Characters
  route: characters
Some routes, notably help-topic and wiki-page, require you to specify a model identifier matching the help topic name or wiki page name. For example:
- title: Getting Started
  route: wiki-page
  id: getting_started
A few routes, notably the theme config files, require multiple model IDs. For these, use the ids parameter. For example:
- title: Custom Styles
  route: textfile
  ids:
    - style
    - custom_style.scss
You can also link to an external URL outside the web portal. List the URL, a display title, and an optional browser tab target. For example:
- target: blank
  title: Interactive Combat Walkthrough <i class="fa fa-external-link-alt" aria-hidden="true">
  url: http://aresmush.com/fs3/fs3-3/combat-walkthrough
For a dividing line, just use:
- divider: true
This only makes sense inside a dropdown menu.
You can use either CloudFlare Turnstile or Google’s ReCaptcha v2 to discourage bots from creating accounts. If you don’t want to use either one, you may want to disable allow_web_registration.
You’ll need to consult the specific Turnstile/ReCaptcha docs for detailed instructions, but in general the steps are the same for both:
Depending on the provider, you might have to hunt a bit to find the site key and secret. For example, in ReCaptcha you might need to look at the code snippets like: <div class="g-recaptcha" data-sitekey="ABCD123"></div>.
To configure the captcha information:
secrets.yml.Beyond the colors, you can add custom CSS styles that will override the Web Portal style to your heart’s content. The Web Portal uses SCSS, which is an enhanced version of CSS that lets you use variables and advanced style settings.
custom_style.scss.The fonts.scss file (accessible via Admin -> Setup -> Text Files) lets you easily customize your website’s fonts.
$body-font is used throughout the main text of the web portal.$primary-font is used on main headings and most things that use the primary-color CSS style.$secondary-font is not actually used in the default theme, but is used for secondary headers in some of the community themes.You can also use these font definitions in your custom CSS styles, and even add your own variables.
To add a Google Font, first get the import statement from Google for the font(s) you want to use:
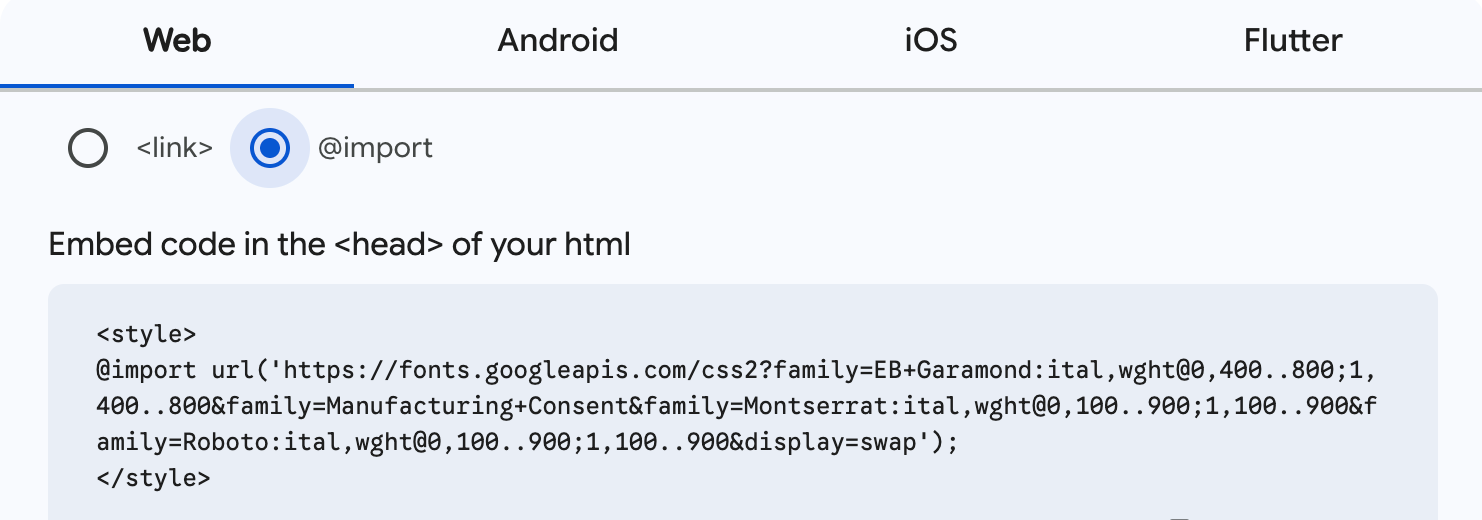
Then copy the import statement into fonts.scss and configure which fonts to use for your body, primary (main titles) and secondary (secondary titles):
@import url('https://fonts.googleapis.com/css2?family=EB+Garamond:ital,wght@0,400..800;1,400..800&family=Manufacturing+Consent&family=Montserrat:ital,wght@0,100..900;1,100..900&family=Roboto:ital,wght@0,100..900;1,100..900&display=swap');

$body-font: "Roboto", sans-serif;
$primary-font: "Manufacturing Consent", sans-serif;
$secondary-font: "EB Garamond", sans-serif;
This only controls the font family. You will need to use custom styles to adjust other font properties like size and weight.
FontAwesome icons are used throughout the site and available for your use in custom HTML.
See Configuring the Wiki.
It is highly recommended that you set up your web portal with a security certificate so players can connect using HTTPS for security. This is typically done during the install process, but can be added at any time. See HTTPS Web Portal Setup.
The Web Portal has a number of configuration options. To set them:
website.yml.Many of the Web Portal pages allow players to enter Markdown. By default, Ares allows HTML in its Markdown text. This gives players a great deal of flexibility for embedding images, youtube videos, or custom styles. However, it could be used to run malicious or annoying javascript code. If you run into trouble, you can tell Ares to run Markdown in safe mode by disabling HTML.
You can configure the maximum sizes for an individual file upload, and an entire character’s folder. By default these are 300kb (per file) and 2000 kb (for the entire folder). Wiki admins are not subject to these restrictions.
By default, Ares assumes that the website will be installed in your home folder in a folder named ‘ares-webportal’. You can change this option if you’ve installed it in a different location.
By default, the character gallery page shows characters organized into tabs by Faction and then into sub-groups by Position. You can change this by editing the two character gallery settings to be any two groups. For example, on BSG:U the gallery was organized by Department then Position.
The main group is required, but you can set subgroup to an empty string ("") if you don’t want to sub-sort.
If set to true, the sidebar appears on the left instead of the default right.
Some games like to put search options into the menu, so you can use this setting to hide the default search box from the sidebar.
The game automatically creates a downloadable export of the wiki and web portal scenes/characters/etc. for players to access offline. If you want to disable this, set the auto export to false. You can also control what time the export happens. (Just don’t schedule it at the same time as your usual backup, as this may cause undue strain on the system.)
This cron job cleans up character backup files. By default it’s nightly. You shouldn’t change this.