This article will walk you step-by-step through the process of setting up your game using DigitalOcean.
Table of Contents
Here’s how it works in brief (full details follow in the rest of the article):
These steps are described in more detail in the next few sections.
Full Disclosure: I get a referral bonus from DigitalOcean if you sign up using this referral link, but you also get a starter credit. The referral bonus helps keep the doors at AresCentral open.
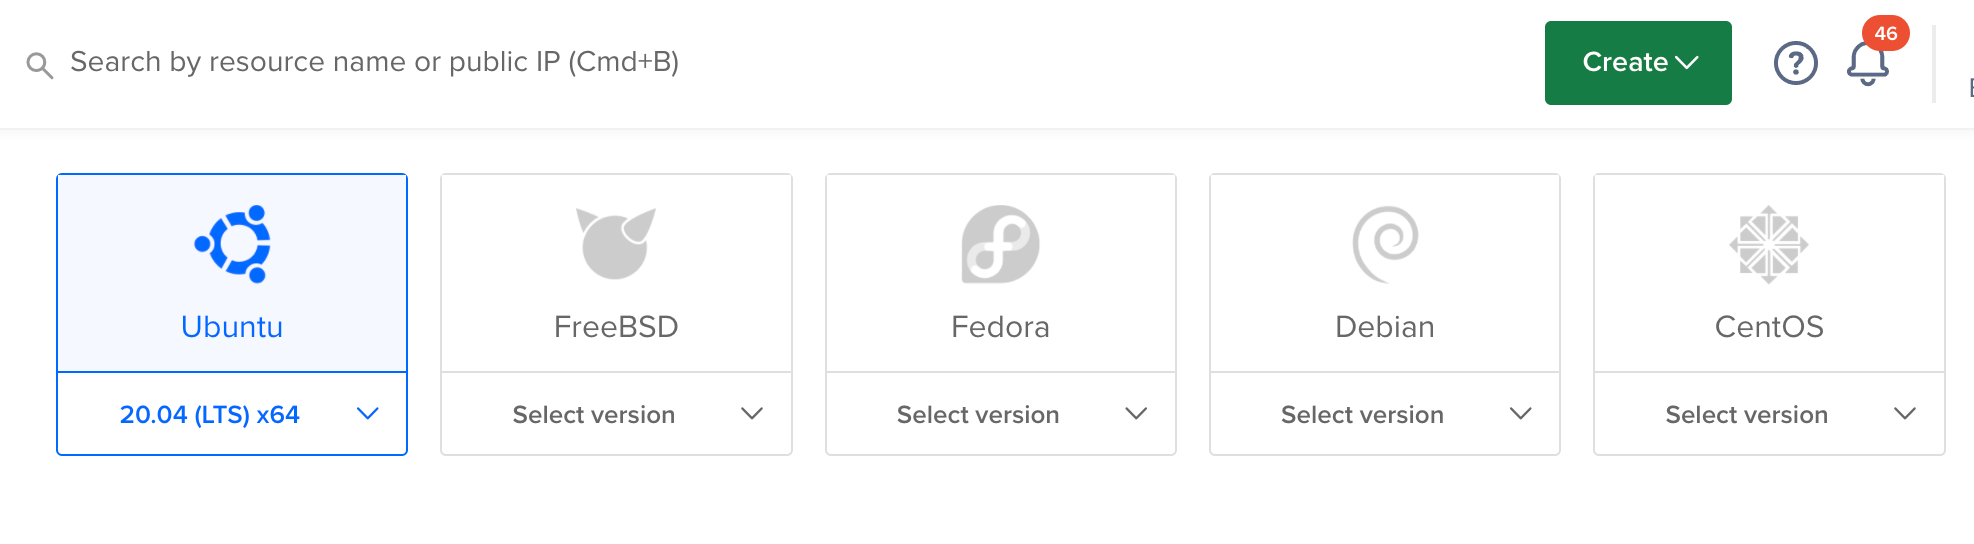
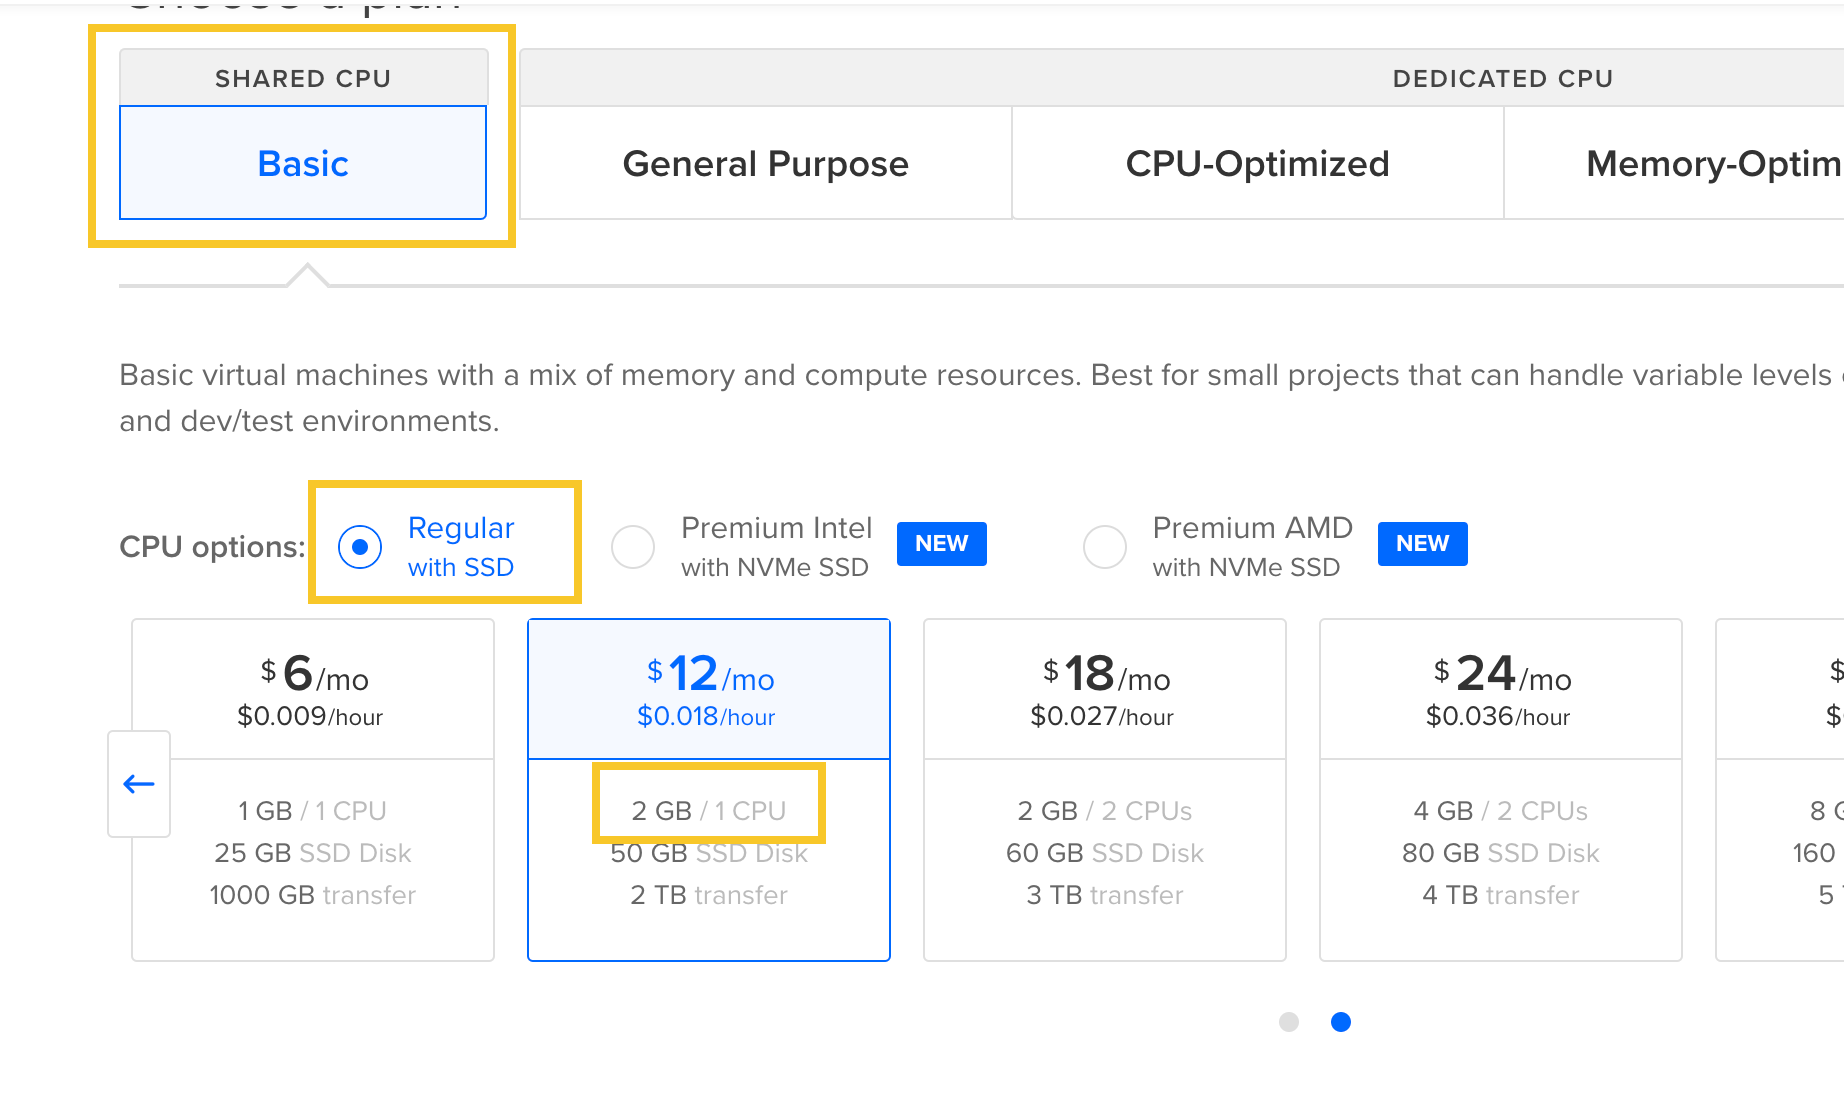
Create a DigitalOcean account if you don’t already have one. From your account dashboard, select Create -> Droplet.
You can host a game using the raw IP address, but most games will want a domain name. See Getting a Hostname if if you want to request a yourgame.aresmush.com subdomain or set up a custom domain.
To connect to your game, you will use the IP address/host name and a tool that supports Secure Shell (SSH) connections:
For more detailed help with the server shell, see Connecting to the Server Shell.
Once your droplet is created, you will need to install the programs Ares requires (Ruby, the Redis Database, the Nginx web server, etc.). For your convenience, a set of install scripts automate the necessary setup.
Log into your Server Shell using the root user.
Copy/paste the following commands to run them one by one. Wait until one command has completed before pasting the next command.
 curl https://raw.githubusercontent.com/aresmush/aresmush/master/bin/setup_server > setup_server

 chmod +x setup_server

 sudo ./setup_server
This will take several minutes. There will be a lot of spam, but eventually it will say it’s done.
The script will create an ‘ares’ user and print the temporary password. This should appear at the end of the giant spam. Keep this in a safe place; you will need it in a moment.
Now we can install your Ares game on the server.
setup_server script should have created the ares user for you automatically and printed the password. Scroll back if you missed it.
Copy/paste the following commands into the shell to run them one by one. Wait until one command has completed before pasting the next command.
 curl https://raw.githubusercontent.com/aresmush/aresmush/master/bin/install > install

 chmod +x install

 ./install

 export NVM_DIR="$HOME/.nvm"
 [ -s "$NVM_DIR/nvm.sh" ] && \. "$NVM_DIR/nvm.sh"
This will take several minutes. There will be a lot of spam, but eventually it will say it’s done.
If you are using a domain name, it is strongly recommended that you configure your web portal with a security certificate, so players can connect securely using HTTPS instead of HTTP.
Run the following commands:
 cd aresmush

 bin/certs
See Configuring HTTPS for details.
After all of the installation is complete, type sudo reboot to reboot the server. This ensures everything comes up working properly.
Your game should be up and running. Check out Next Steps to learn about connecting to it and testing it out.